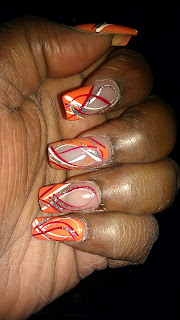

I'm all for false nails. They look great and when done properly you can't tell the difference between the real or fake. But acrylics, gel, glass, etc they can wreak havoc on your real nails. To prepare your nails for the healing process after the removal of the fake nails, you will need a few key items to achieve that. Here are some steps to help you remove acrylic nails:
Steps to Remove Acrylic Nails
Method One: Soak the Acrylic Nails in Acetone
1). Clip your nails. Use a nail clipper to trim the tips of your acrylic nails short. Cut off as much of the acrylic as possible. If cutting is difficult due to the thickness of the nails, use a course nail file to file them. But make sure you don't catch any of your nail bed because it will bleed.
2). File the topcoat off of the nails. Use a fine-grade buffer to file off the paint and remove a much of the acrylic as possible. Use long strokes that run the length of the nail.
3). Warm up some acetone. Pour the acetone into a small glass bowl and cover the top of the bowl with plastic wrap or foil. Use an elastic band to hold the plastic wrap or foil in place.
Place the bowl of acetone into a bowl of hot water. Ensure the waterline is below the top of the bowl with the acetone so the water doesn't mix with the acetone.
Wait 3 to 5 minutes for the acetone to warm.4). Apply petroleum jelly to the skin surrounding your nails. Acetone dissolves plastic and is also hard on skin, so it's important to protect yourself. This step will prevent your skin from becoming irritated by the acetone, particularly if you have hangnails.
Take care not to get too much petroleum jelly on your nails, since the acetone should be able to reach it and dissolve it.
Use a cotton-tipped wooden applicator if you need help applying the petroleum jelly more precisely.5). Apply the acetone to your nails. Saturate a cotton ball per nail in the warmed acetone, then place the cotton balls on the tips of your fingers. Wrap them tightly against the acrylic nails using strips of aluminum foil. Let your nails soak in the acetone for 30 minutes.
You use a non-plastic tape to fasten the cotton balls if you don't have aluminum foil.
You can also simply soak your nails in the bowl of acetone if you know that acetone doesn't irritate your skin.6). Remove the foil and cotton balls from your fingertips. The cotton ball and the nail should come off easily.
If you soaked your acrylic nails in the bowl of acetone, gently pry the nails off using an orange wood stick.
If the acrylic nails are still firmly stuck, repeat the process for another 20 minutes and attempt to remove them again.7). Scrape off the leftover acrylic with the nail buffer. The acrylic should be soft from the acetone bath, so take the opportunity to buff the rest of it away. If the acrylic begins to harden again while you're buffing, use a cotton ball soaked in acetone to dampen it.
8). Shape your natural nails. Use nail clippers and a nail file to smooth the edges. Buff your nails lightly with a fine-grade nail buffer, moving from the base of the nail to the tip.
To avoid damaging your nails, file in one direction only, and avoid using a sawing motion.
The top few layers of your nails may have been removed with the acrylic. Be careful not to tear or damage them further when file and buff them.9). Restore the moisture to your hands. Acetone causes skin to become extremely dry. Rinse off the remaining traces with soap and water. Dry your hands and rub them with body oil, olive oil or a moisturizing lotion.
Essential Tools:
Nail Clipper
Finger Nail File
Gel Cuticle Remover
Mini or Large 4 Way Buffer
Hand Cream (Your Fave or the one I use Moisture Therapy by Avon)
Cuticle Oil
Cuticle Oil
Nail Hardener (Not Pictured)
Polish of Your Choice (Clear or Colored it's Up to You)
Polish of Your Choice (Clear or Colored it's Up to You)
Okay give your hands a day to rest from the acetone or whatever removal method you use. Then you will start the process of getting your hands back to normal.
Step 1: Use your cuticle remover gel. If you have the one I have which is Sally Hensen, you place a thin strip of of the cuticle gel on every cuticle. Allow it to sit for 2 to 3 minutes (it can sit for no longer than 10 minutes). Push down your cuticles with the cuticle stick. Remove the excess cuticle gel and cuticles. You can also use the nail clipper to cut the excess cuticles off but they should remove easily with the cuticle gel. Just follow the directions on the tub and you should be fine.
Step 2: Cut down your nails and even them out. Use a file to shape the nail.
Step 3: Use the 4-Way buffer to buff your nails until the surface is even and shiny.
Step 4: Use the cuticle oil on your cuticles. Wash your hands thoroughly.
Step 5: Apply Nail Hardener
Step 6: Polish if you like.
Step 7: Once your polish of choice has dried use your hand lotion to lotion your hands.
*Side Note: If your looking for softer hands you can use a sugar or salt scrub to make your hands softer after you buff your nails.
Your nails will slowly heal and go back to normal. All they need is a little tender loving care, TLC!
Hope this helps! If you have anymore questions, join the blog and email me!
designsbytiffanye@gmail.com

.png)


No comments:
Post a Comment